WAF for SaaS
Web Application Firewall (WAF) allows you to create additional security measures through Cloudflare. As a SaaS provider, you can link custom rules, rate limiting rules, and managed rules to your custom hostnames. This provides more control to keep your domains safe from malicious traffic.
As a SaaS provider, you may want to apply different security measures to different custom hostnames. With WAF for SaaS, you can create multiple WAF configuration that you can apply to different sets of custom hostnames. This added flexibility and security leads to optimal protection across the domains of your end customers.
Before you can use WAF for SaaS, you need to create a custom hostname. Review Get started with Cloudflare for SaaS if you have not already done so.
You can also create a custom hostname through the API:
Required API token permissions
At least one of the following token permissions
is required:
SSL and Certificates Write
curl "https://api.cloudflare.com/client/v4/zones/$ZONE_ID/custom_hostnames" \ --request POST \ --header "X-Auth-Email: $CLOUDFLARE_EMAIL" \ --header "X-Auth-Key: $CLOUDFLARE_API_KEY" \ --json '{ "hostname": "<CUSTOM_HOSTNAME>", "ssl": { "wildcard": false } }'To apply WAF to your custom hostname, you need to create an association between your customer's domain and the WAF configuration that you would like to attach to it. Cloudflare's product, custom metadata allows you to do this via the API.
-
Locate your zone ID, available in the Cloudflare dashboard.
-
Locate your Authentication Key by selecting My Profile > API tokens > Global API Key.
-
Locate your custom hostname ID by making a
GETcall in the API:
Required API token permissions
At least one of the following token permissions
is required:
SSL and Certificates WriteSSL and Certificates Read
curl "https://api.cloudflare.com/client/v4/zones/$ZONE_ID/custom_hostnames" \ --request GET \ --header "X-Auth-Email: $CLOUDFLARE_EMAIL" \ --header "X-Auth-Key: $CLOUDFLARE_API_KEY"- Plan your custom metadata. It is fully customizable. In the example below, we have chosen the tag
"security_level"to which we expect to assign three values (low, medium, and high).
- Make an API call in the format below using your Cloudflare email and the IDs gathered above:
Required API token permissions
At least one of the following token permissions
is required:
SSL and Certificates Write
curl "https://api.cloudflare.com/client/v4/zones/$ZONE_ID/custom_hostnames/$CUSTOM_HOSTNAME_ID" \ --request PATCH \ --header "X-Auth-Email: $CLOUDFLARE_EMAIL" \ --header "X-Auth-Key: $CLOUDFLARE_API_KEY" \ --json '{ "custom_metadata": { "customer_id": "12345", "security_level": "low" } }'This assigns custom metadata to your custom hostname so that it has a security tag associated with its ID.
-
Locate the custom metadata field in the Ruleset Engine where the WAF runs. This can be used to trigger different configurations of products such as WAF custom rules, rate limiting rules, and Transform Rules.
-
Build your rules either through the dashboard or via the API. An example rate limiting rule, corresponding to
"security_level"low, is shown below as an API call.
Required API token permissions
At least one of the following token permissions
is required:
Response Compression WriteConfig Settings WriteDynamic URL Redirects WriteCache Settings WriteCustom Errors WriteOrigin WriteManaged headers WriteZone Transform Rules WriteMass URL Redirects WriteMagic Firewall WriteL4 DDoS Managed Ruleset WriteHTTP DDoS Managed Ruleset WriteSanitize WriteTransform Rules WriteSelect Configuration WriteBot Management WriteZone WAF WriteAccount WAF WriteAccount Rulesets WriteLogs WriteLogs Write
curl "https://api.cloudflare.com/client/v4/zones/$ZONE_ID/rulesets/phases/http_ratelimit/entrypoint" \ --request PUT \ --header "Authorization: Bearer $CLOUDFLARE_API_TOKEN" \ --json '{ "rules": [ { "action": "block", "ratelimit": { "characteristics": [ "cf.colo.id", "ip.src" ], "period": 10, "requests_per_period": 2, "mitigation_timeout": 60 }, "expression": "lookup_json_string(cf.hostname.metadata, \"security_level\") eq \"low\" and http.request.uri contains \"login\"" } ] }'To build rules through the dashboard:
-
Log in to the Cloudflare dashboard ↗ and navigate to your account and website.
-
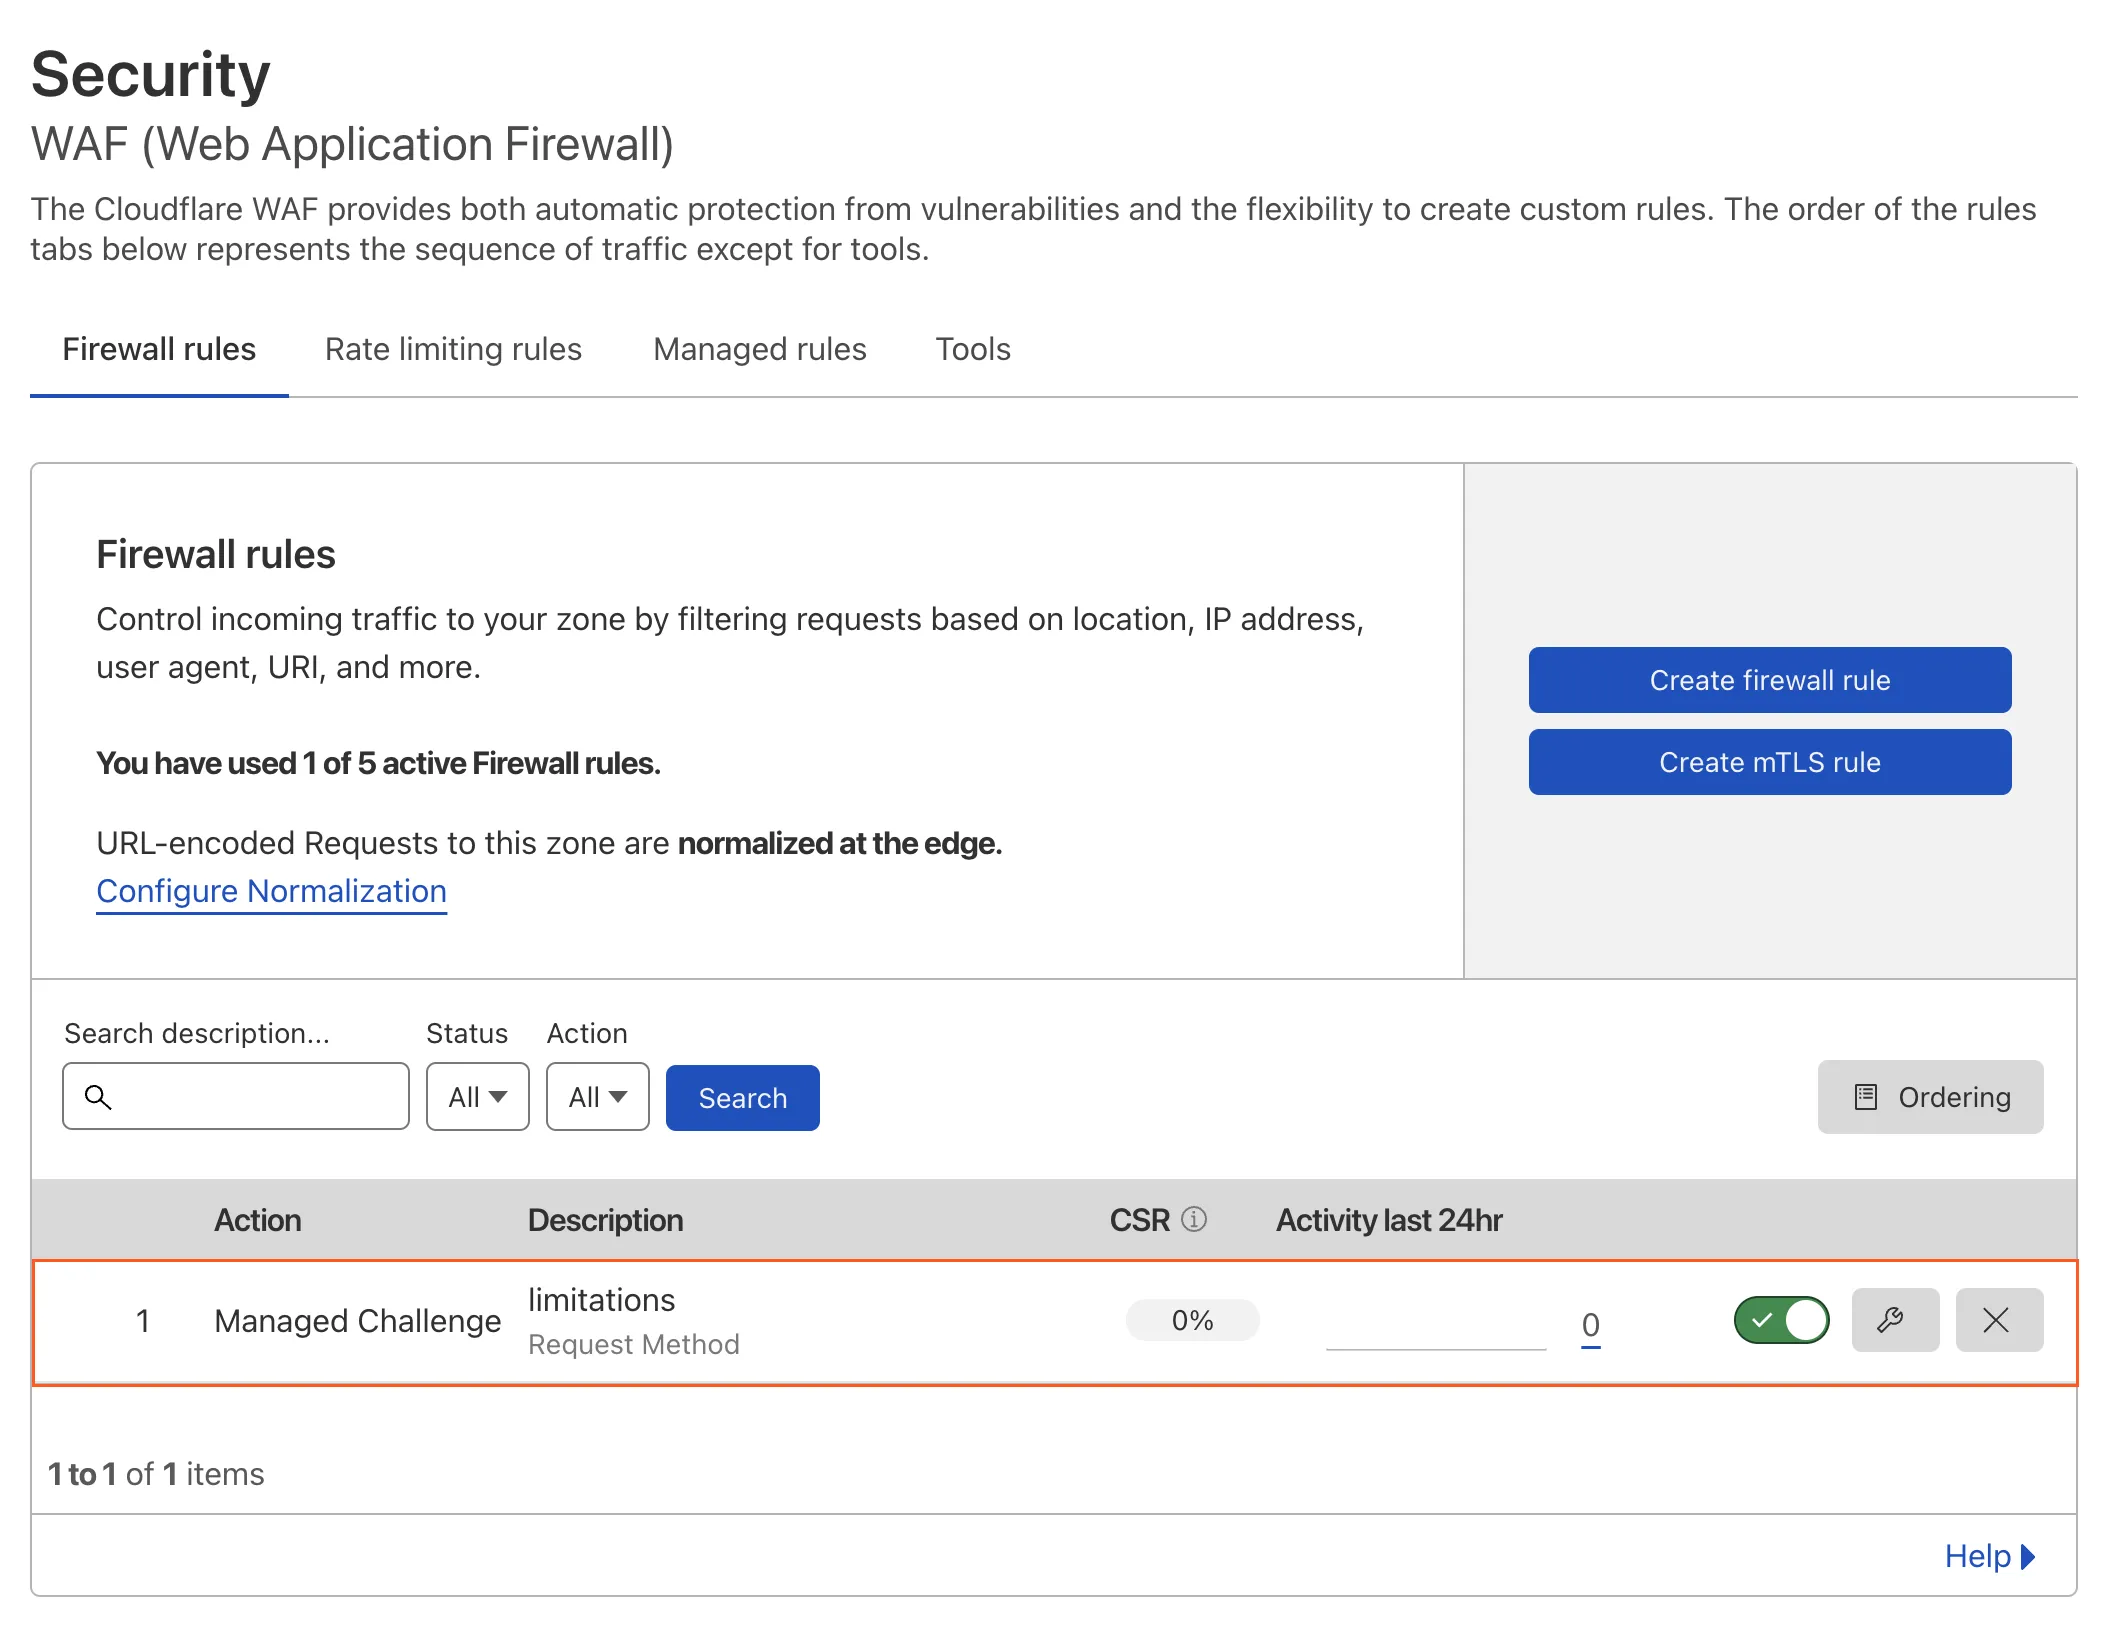
Select Security > WAF.
-
Follow the instructions on the dashboard specific to custom rules, rate limiting rules, or managed rules, depending on your security goal.
-
Once the rule is active, you should see it under the applicable tab (custom rules, rate limiting, or managed rules).
Was this helpful?
- Resources
- API
- New to Cloudflare?
- Products
- Sponsorships
- Open Source
- Support
- Help Center
- System Status
- Compliance
- GDPR
- Company
- cloudflare.com
- Our team
- Careers
- 2025 Cloudflare, Inc.
- Privacy Policy
- Terms of Use
- Report Security Issues
- Trademark